• Home
  • Categories
    • Beauty
    • Fashion
    • Lifestyle
  • Steals & Deals
  • About Me
  • Contact

Just Jodi Style

Hump Day Treat – 4th of July Themed

June 28, 2017

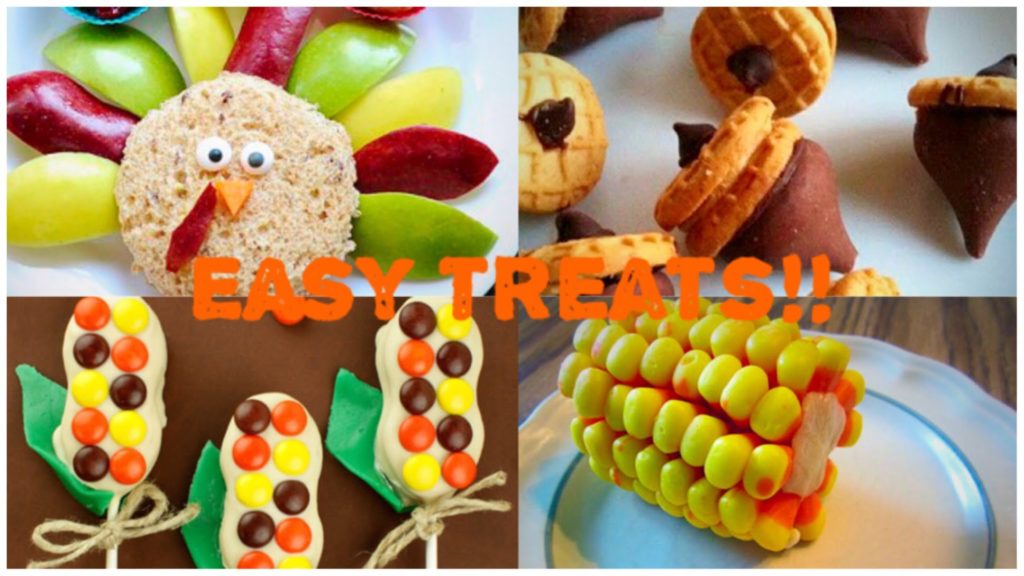
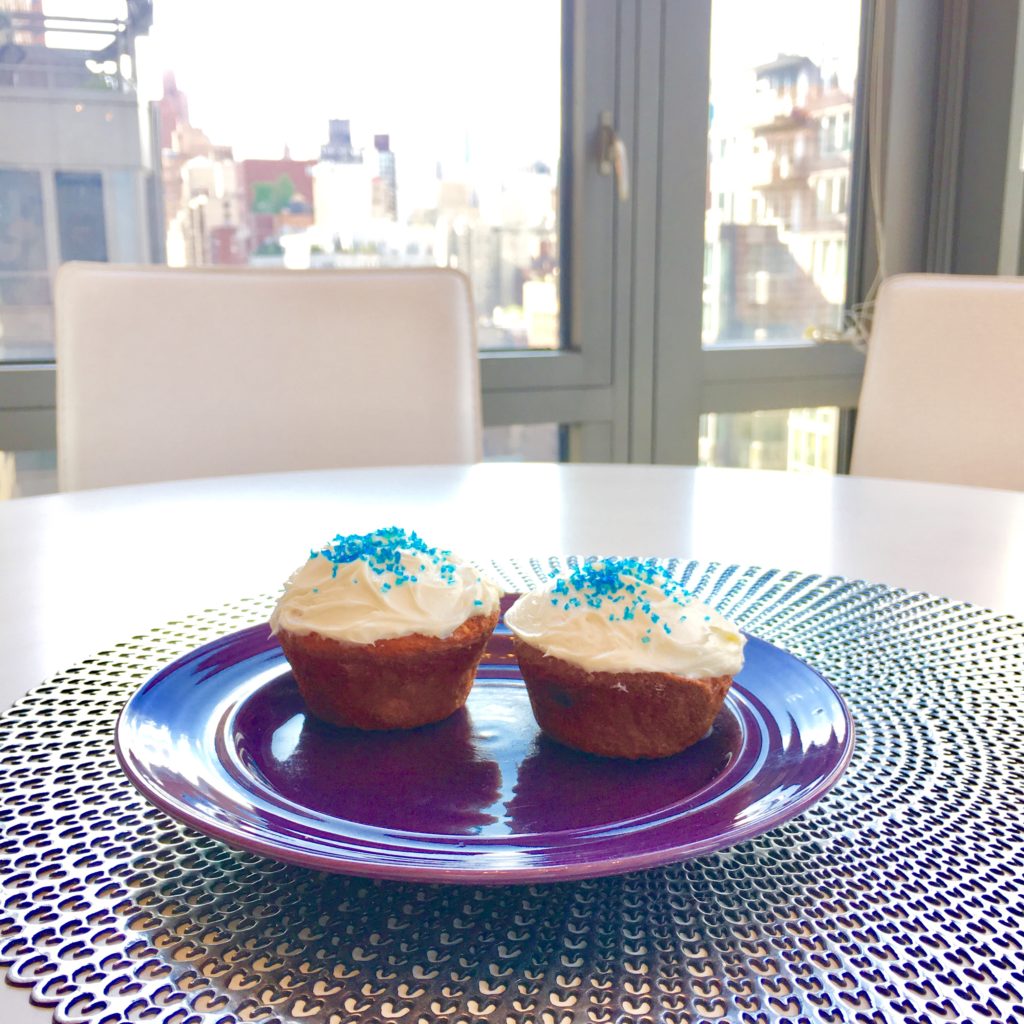
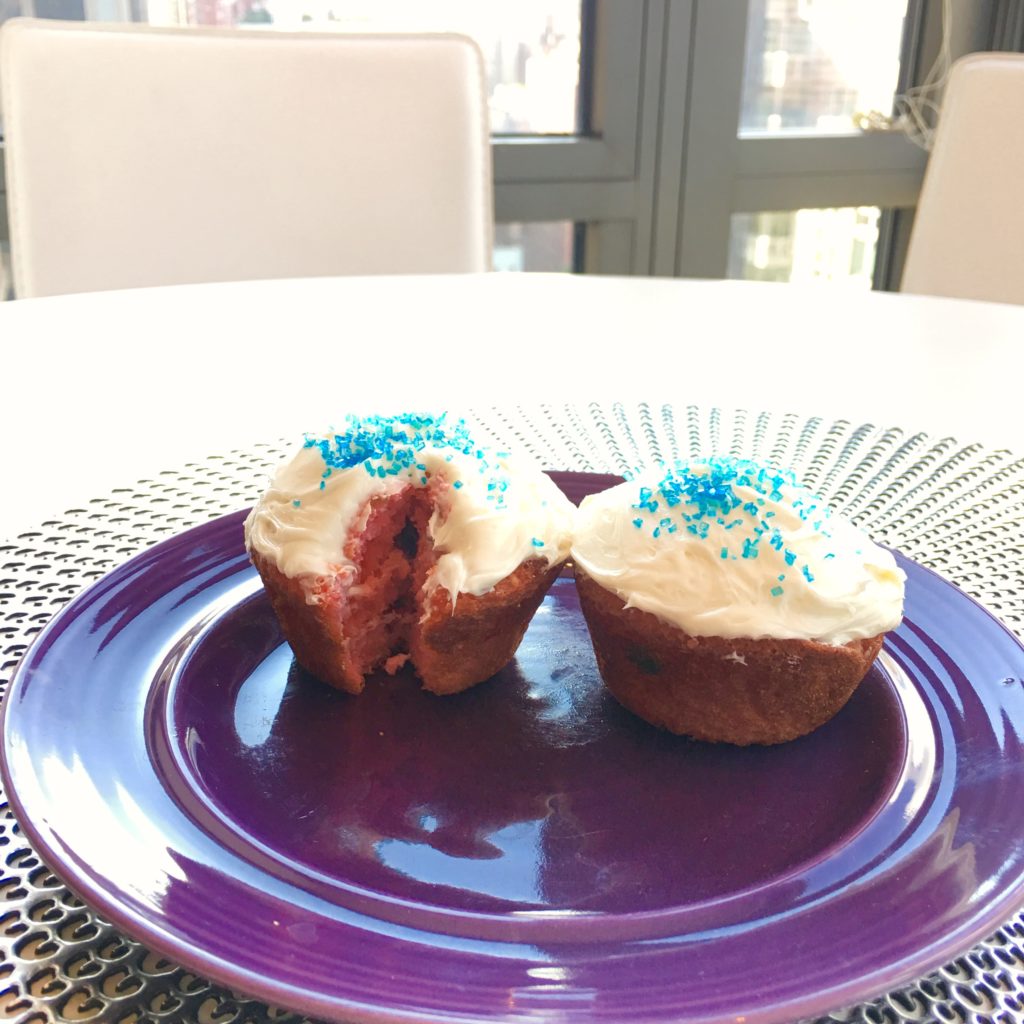
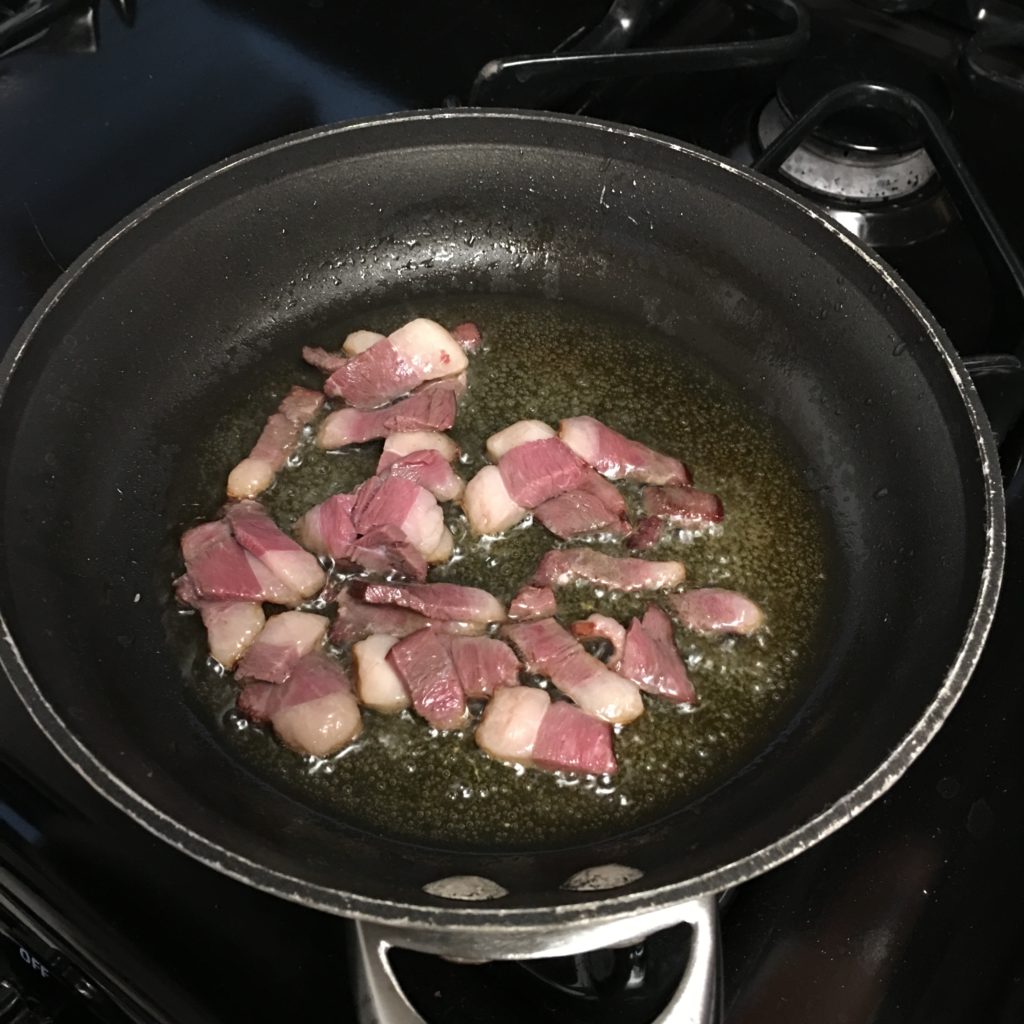
Happy Wednesday! With the holiday weekend coming up I thought I would make today’s treat themed for this upcoming 4th of July. One of my favorite treats of all time are funfetti cupcakes. In middle school I used to make these for all of my friends birthdays. You can easily make them your own by just a few drops of food coloring into the cupcake mix. I have in the past used the red food coloring for cupcakes, but it always seemed to turn out more pink than red. This time I added about half a dozen drops of red food coloring and it seemed to have done the trick. Now I know that everyone thinks that vanilla frosting is all the same, but the funfetti frosting is something way different. I don’t what it is about it that makes it taste so good. If you can’t find it in your grocery store check your local CVS. Thats where I found it when Fairway didn’t have it. To make my treat fully patriotic I added some blue sprinkles on top to give it that final touch.  If you are looking for some other fun July 4th treat ideas here are some fun ideas for you to try out.

  • Red white and blue cookies – take sugar cookie dough and add food coloring and roll it all together then back
  • Red and blue jello cups with whip cream on top – make red jello in a cup and put in fridge then make the blue jello and pour on top of the red jello then put it in fridge until firm
  • patriotic pretzels – pretzels sticks drizzled with white chocolate and red and blue sprinkles

Hope everyone who is going out of town for the 4th has a safe and fun holiday! For those of staying in Manhattan make sure to find a rooftop or a balcony to see the fireworks this year. I saw them practicing them last night on my way home from Brooklyn. I just hope my sweet puppy Stella doesn’t get scared by them this year <3


FacebookTwitterPinterest

Leave a Comment
Filed Under: Lifestyle Tagged With: 4th of July, Cupcake, cupcakes, Eeeats, Food Coloring, Funfetti, Hump Day, Hump Day Treat, July 4th Treats, June, June 2017, recipe, Treat, Wednesday, Yummy

Hump Day Treat – Duck Bacon Mac n Cheese

May 17, 2017

You now what day it is….. HUMPDAY!!! We are half way through the week everyone! I am so excited that here in New York City it is starting to finally get warm and feel like SUMMER!!! There are so many times that I have different things in my fridge and I don’t know how some ingredients could work together and make something different. I will be the first to admit that I have made some dishes in the past that in theory should have been good, but in reality were really horrible. One of those ideas that wasn’t horrible was Bacon Mac n Cheese. As I have previously posted before I am normally not a huge bacon eater and haven’t been my entire life until I tried duck bacon. Duck bacon is thicker and in my opinion juicier than regular bacon. When making bacon mac n cheese there is no need to cook the two together if you just want to eat the two together. My go to mac n cheese has been the new Cracker Barrel white sharp cheddar. In my house one of the staple appetizers that my Mom puts out for our guests are slices of sharp cheddar Cracker Barrel cheese. Now if you are looking for a great sharp cheddar cheese that isn’t expensive Cracker Barrel is the answer. When making bacon mac n cheese make your mac n cheese like it says on the box and once that is finished mix in your crispy thin slices of duck bacon. I suggest that if you are mixing your mac n cheese together in the pot you cooked your noodles in (which is what I normally do to avoid more dirty dishes) I would then suggest you putting the pot cover over the mac n cheese for about 3 minutes. This will allow the bacon juices to be absorbed into the mac n cheese. If you want to do something even more creative with your dish here is an idea for you all. After mixing the duck bacon with the mac n cheese take a pyrex dish and pour in your bacon mac n cheese mix. Cover the top of the bacon mac n cheese with more bacon and some bread crumbs. Use the broil function on your oven and place the pyrex in the oven until the top is golden brown. This will give your dish that extra crunchy taste. Hope you all enjoy today’s humpday treat recipe. <3


FacebookTwitterPinterest

Leave a Comment
Filed Under: Lifestyle Tagged With: Bacon, Bacon Mac n Cheese, Cracker Barrel, Duck Bacon, Eeeats, Humpday treat, Mac n Cheese, May, recipe, Treat, Wednesday, Yummy

Hump Day Treat- Superbowl Ready

February 1, 2017

Happy February!! With Superbowl being this Sunday I thought that I would share with you a recipe that all of your guests would enjoy. I have added a little twist to the simple potato skins. Now as a kid I never really liked bacon. I know crazy right! However, recently I have discovered my love for Duck Bacon. Yes you read that correctly Duck Bacon. It was in my local Fairway Grocery store and it is delicious. Here is what you need to make these most delicious potato skins.

Ingredients:

4 – 6 Idaho potatoes depending on how many people you are having

1 package of duck bacon

1 chives

1 sour cream

1 package of sharp cheddar cheese ( I purchased kraft that was already shredded)


Directions:

1.Preheat the oven to 400 degrees

2.On a cookie sheet put down some aluminum foil. Pierce your potatoes all over. Line the aluminum foil with baking spray. Place the pierced potatoes on the cookie sheet and put them in the oven for an hour. (They should be able to be pierced with a fork)

3.When the potatoes have about 10 minutes left in the oven cut up the Duck Bacon into small pieces and fry them in a pan until crispy. Turn the heat down so they stay warm.

4.Once potatoes are done remove them and let them cool down for about 10 minutes.

5.Once they are cooled down cut them half lengthwise. Then scoop out the center not so that you see the bottom of the skin just enough so you can fill it with the cheese and bacon. You can use the excess potato insides for mashed potatoes or even gnocchi!

6.Put the sliced potatoes back on the same cookie sheet they just came off of. Cover them with cheese and the bacon. Put the broiler on in the oven and place them inside. I left mine in the oven for about 8 minutes even though the cheese was bubbling.

7.Remove from the oven and if you want cut them in half depending on if you want them into smaller bite sized treats.

ENJOY!!!!!


FacebookTwitterPinterest

Leave a Comment
Filed Under: Lifestyle Tagged With: Bacon, Cheddar, Cheddar Cheese, Duck Bacon, February, Hump Day, Hump Day Treat, Potato, Potato Skin, Potato Skins, recipe, Sharp Cheddar, Supberbowl, Superbowl Sunday, Treat, Wednesday, Winter, Yum, Yummy

Hump Day Treat – New Years Appetizers

December 28, 2016

Happy Wednesday! With New Years Eve fast approaching I know that everyone who is throwing parties or having people over before a night on the town are trying to get all the last minute goodies together. One of my favorite appetizers to make is a baked brie. I have featured the recipe here on Just Jodi Style, however it is a bit of a messy clean up especially when you may be leaving to go out right after. One of the best things that I have found to use for any kind of appetizer are pre made filo cups that you can find in any freezer section at your local grocery store. I personally keep one package always on hand in my freezer just in case. Now there are so many things you can do with these filo cups. You can fill them with brie and jelly, spinach, cheddar cheese with bacon or even chocolate! There are so many options that you can do it just all depends what you want to have for your party. I have used this when I don’t want to make the whole baked brie and it is the easiest clean up. My only warning is you don’t realize how hot it is when you bite into it so don’t serve them straight from the oven. Give them at least 5 minutes to cool before serving. Otherwise based upon personal experience you will burn the roof of your mouth. OUCH! If you are making it in the oven I suggest putting it in the oven at 375 degrees for about 20 minutes with any dish. Hope everyone is having a great Wednesday! <3


FacebookTwitterPinterest

Leave a Comment
Filed Under: Lifestyle Tagged With: Appetizers, December, Hump Day, Hump Day Treat, New Years, New Years Appetizers, recipe, Treat

Hump Day Treat – The French Apple Tart

December 21, 2016

Happy Wednesday! Today is my Mom’s birthday and in honor of that I wanted to share with you one of her recipes that she recently made this past Thanksgiving. Now my Mom and I both love sweets, but when it comes to the holidays my Mom is the master at dessert. I have always loved apple pie, but no one other myself would eat it. So this past Thanksgiving my Mom made a thin french apple tart and when I tell you that it looked like a work of art I am not joking. It was so thin and delicious that it didn’t even feel like you were eating anything. I honestly now prefer this than an apple pie. It was that good! Here is the recipe for this amazing dish.

Ingredients:

½ (15 ounce ) package refrigerated pie dough ( pillsbury has these)

¼ cup sugar

½ teaspoon ground cinnamon

2 pounds Golden Delicious apples, peeled, cored and thinly sliced (Try to make them as thin as possible)

2 ½ tablespoons honey

½ teaspoon vanilla extract

Directions:

1.Preheat oven to 425 degrees fahrenheit

2.Place dough on a lightly floured surface

3.Roll into a 12 inch circle and place on a 12 – inch pizza pan

4.Combine sugar and cinnamon and sprinkle 1 tablespoon of the sugar mixture over the dough

5.Arrange apple slices spokelike on top of the dough. Do this by working from outside edge of the dough to the center

6.Sprinkle app over the remaining apple slices that are now on the dough the remaining sugar mixture

7.Place in the oven for 30 minutes

8.Right before  you are about to take the apple tart out of the oven combine the honey and vanilla in a microwave safe bowl

9.Microwave on high for 40 seconds

10.Take the tart out of the oven. While the tart is still warm brush honey mixture over it.

11.Serve this dessert warm and if you like with a scoop of vanilla ice cream. ENJOY!

Hope you all enjoy my mom’s recipe on her birthday <3 Love you mom!


FacebookTwitterPinterest

Leave a Comment
Filed Under: Lifestyle Tagged With: Apple, Apple Tart, December, French, Hump Day, Hump Day Treat, Mom, recipe, Thin Apple Tart, Thin French Apple Tart, Thin Tart, Treat, Wednesday

Hump Day Treat – Father Christmas Hats

December 14, 2016


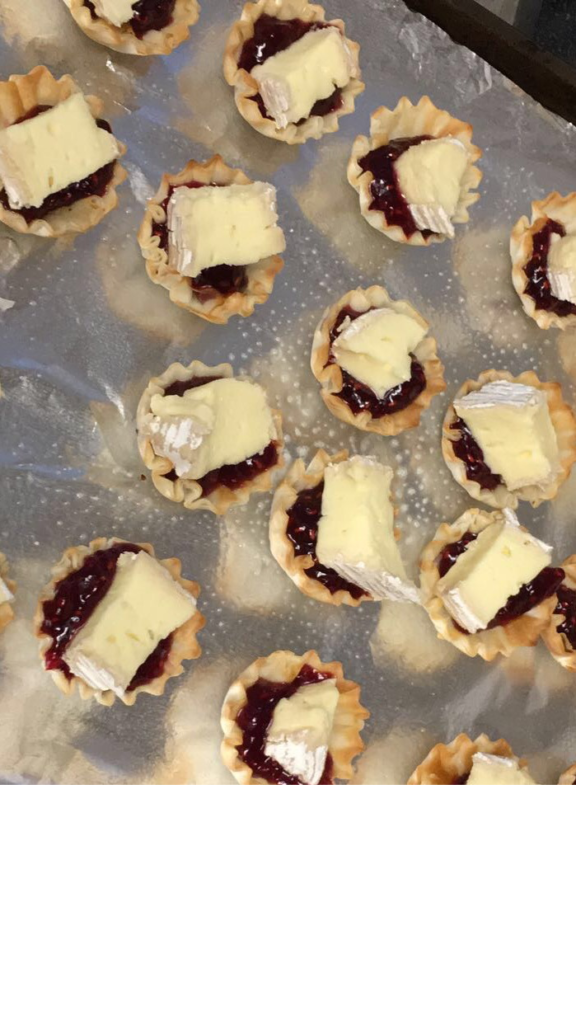
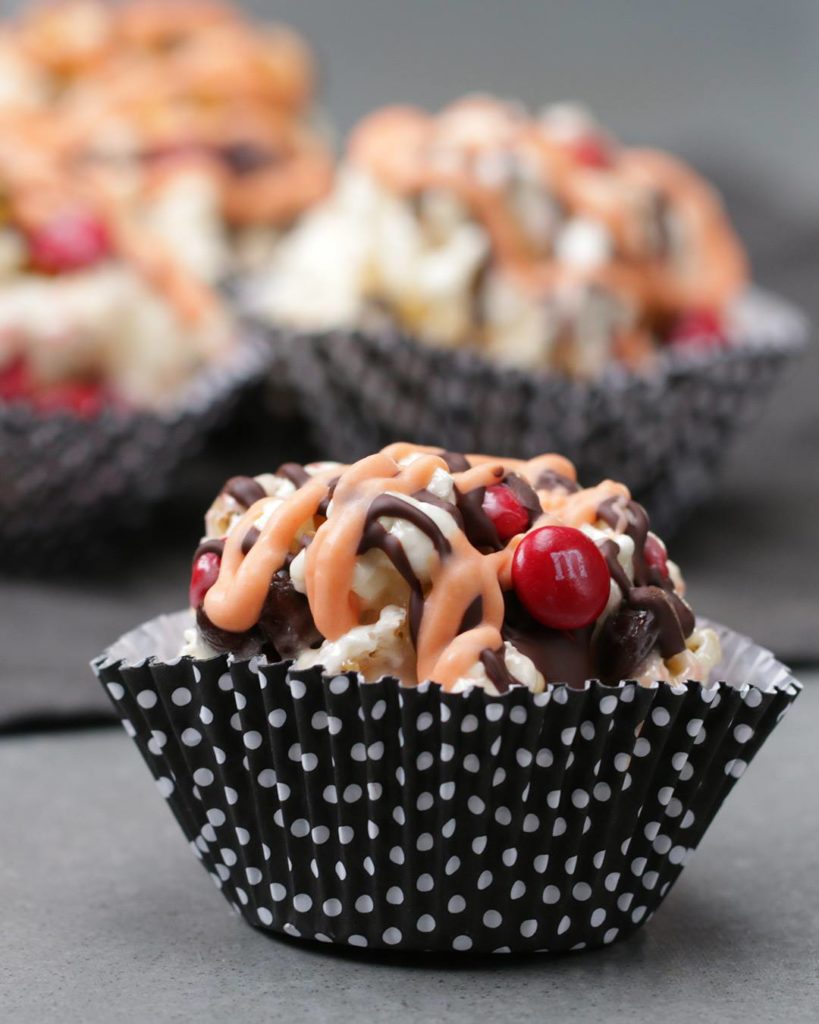
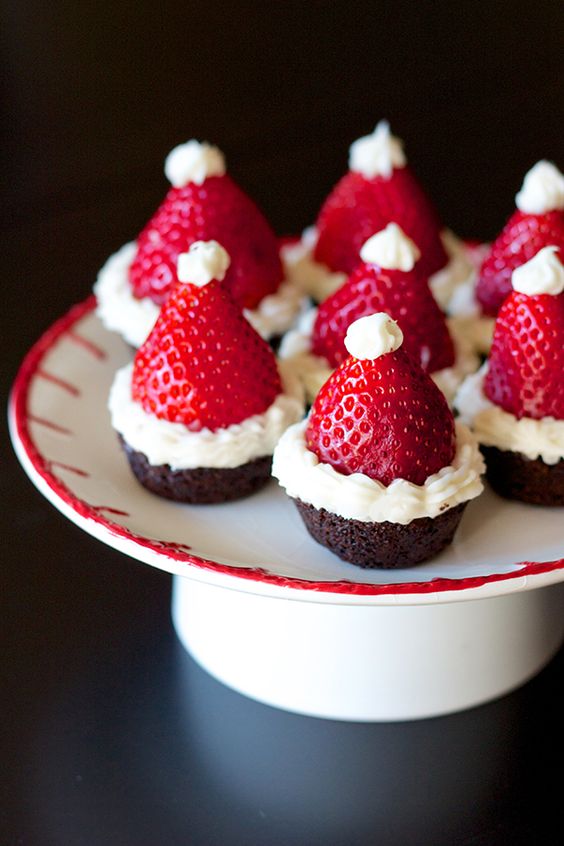
Happy Wednesday! It’s time for another hump day treat recipe here on Just Jodi Style and today’s theme is Christmas. I personally don’t celebrate the holiday, but I do love all of the delicious treats that come along with it. This recipe I found from Tastemade and they look absolutely adorable! Check out the recipe here below.

Ingredients:

  • 24 strawberries
  • For the cake
  • 200g unsalted butter, softened
  • 25g vegetable oil
  • 260g caster sugar
  • 2 eggs
  • 300g plain flour
  • 1 ½ baking powder
  • 2 tbsp cocoa powder
  • ⅓ cup whole milk
  • For the frosting
  • 125g unsalted butter
  • 200g icing sugar
  • 100g cream cheese

Directions:

  1. Preheat the oven to 356 degrees .
  2. Cream together the butter, oil and sugar until pale.
  3. Add in the eggs one at a time, mixing well between each one. Turn the whisk right down, if using an electric one, and add in the milk.
  4. Sift in the dry ingredients and fold through the mix.
  5. Grease the mini cupcake tray, and place a teaspoon amount of the mix into each of the cake holes.
  6. Place in the hot oven for around 12 minutes until fluffy and cooked through. The way to check if they are cooked all the way through is to poke the cupcakes with a toothpick. If the toothpick comes out clean then it is cooked!
  7. While the cupcakes are baking, make the frosting.
  8. Whisk the butter with an electric whisk until very pale. Then on a low speed, whisk in the icing sugar and once combined, whisk in the cream cheese till just mixed. Place in a piping bag with a round hole nozzle attached or simple cut off the end of the piping bag.
  9. Once the cakes are out and cooled, pipe a spiral shape on the top of the cakes. Start from the outside and slowly work your way into the centre.
  10. Trim the top of the strawberry and place on top. Finish with a blob of frosting on the top.

And there you go! Hope you all enjoy and have a great Wednesday <3

Link to the TASTEMADE website <3

image taken from google


FacebookTwitterPinterest

Leave a Comment
Filed Under: Lifestyle Tagged With: Channukah, Christmas, December, Father Christmas, Father Christmas Hats, Hats, Holiday, Holidays, Hump Day, Hump Day Treat, recipe, Treat, Wednesday

Hump Day Treat – Dog Cakes

December 7, 2016

img_7079

img_7059-3

Happy Wednesday Everyone! So if you saw yesterday’s post you know that it was my sweet puppy Stella’s 1st birthday! Now I didn’t have the chance to throw her a birthday party ( Yes that is a thing dog birthday parties don’t laugh) and I wanted to make her birthday extra special. I had previously taken Stella to her first birthday party for her puppy friend Oliver and his mom had got him a cake made from a bakery in the city. Now I didn’t think of getting a cake made until this past weekend and I knew it would be too late to order one so I thought why not make one myself? How hard could it really be? I searched different stores to get a cake pan in the shape of a dog bone first, but since it was just for Stella I opted out to make 3 small pie ones instead of one large one. Thanks to food.com for the recipe Stella really did enjoy it and still this morning is looking to see if she left any crumbs on the ground 🙂

Ingredients:

1 egg

¼ cup peanut butter ( I used skippy natural creamy)

¼ cup cooking oil ( I personally used vegetable oil)

1 teaspoon vanilla extract

⅓ cup of honey (optional but I personally used it)

1 cup carrot, shredded

1 cup whole wheat flour ( if you don’t have whole wheat flour then use white flour but it’s better with whole wheat flour)

1 teaspoon baking soda

Directions:

1.Preheat oven to 350 degrees

2.Grease your baking pans that you chose to use. For me I chose 3 small disposable pie tins.

3.Combine the egg, peanut butter, oil, vanilla and honey (if you use honey) in a large bowl. Blend well

4.Stir in the carrots and mix thoroughly

5.Now add in the flour and baking soda and mix it all together fully

6.Spoon the batter into prepared pans. To make the batter flat in the pan just lift it up and lightly tap it to the counter surface. I personally do this when I get froyo in order to add more into my cup!

7.If you want add on top a milkbone, but don’t push it into the cake just place it nicely on top of the batter

img_7055

8.Bake in oven for 40 minutes

9.Take out cakes and let them cool in pan for 10 minutes then if you have put on a wire rack to cool completely or onto a different plate.

Hope all of your furry friends enjoy this cake! Stella for sure did <3

If you want to see the recipe yourself here is the link Dog Cake Recipe 


FacebookTwitterPinterest

Leave a Comment
Filed Under: Lifestyle Tagged With: Birthday Cake, Birthday Cake for Dogs, Cold, December, Dog, Dog Cake, Hump Day, Hump Day Treat, recipe, Treat, Wednesday, Winter

Hump Day Treat! Thanksgiving!

November 23, 2016

maxresdefault

It’s Wednesday so you know what that means? Hump Day Treat! Today since it is the day before thanksgiving I wanted to share some of cute ideas for kid friendly themed thanksgiving treats. Thanks to the facebook page Tastemade I found this adorable video that gives you some great ideas for kids.


Acorn Kisses

Ingredients:

Mini Chocolate Chip

Hershey Kisses

Mini Vanilla Wafers

Directions:

1.Melt a small amount of chocolate chips

2.Use some melted chocolate chips and put a dab on side of the wafer and press a mini chocolate chip on it

3.Use some chocolate frosting and put a dab on the opposite side of the wafer and stick the hershey kiss on it

4.ENJOY!

Pilgrim Hats

Ingredients:

Fudge stripe cookies

Mini reese’s cups

Melted white chocolate chips

Orange food coloring

Directions:

1.Melt some white chocolate chips and add a few drops of orange food coloring in it

2.Place the fudge stripe cookie with the fudge facing upward then place the reeses peanut butter cup upside down to cover the hole from the cookie

3.Then take the orange melted chocolate and pipe around the reese’s cup in order to seal it to the cookie and add a little decoration for the hat

4.ENJOY!

There are more ideas courtesy of this video from Tastemade. Check it out now incase you want to make some of these tasty treats tomorrow <3

Tastemade

(image taken from google)


FacebookTwitterPinterest

Leave a Comment
Filed Under: Lifestyle Tagged With: Acorn Kisses, Holiday, Hump Day, Hump Day Treat, Kid Friendly, november, Pilgrim Hat, recipe, Thanksgiving, Treat, Turkey Day, Wednesday

Hump Day Treat: Banana Bread

November 16, 2016

banana-bread-2

Happy Wednesday! Today’s Hump Day Treat is one of my favorite recipes thanks to my Mom. My Mom is known for her cooking amongst all of our family and friends, but if you ask any of my friends this is one of their favorite treats that she would make for us when we had some left over bananas. Now if you want to make banana bread one of the main things you need to remember is you don’t need to use super old bananas, but it does help when they are a little bit brown on the outside. You can also make this recipe into banana muffins or keep it as the traditional loaf of banana bread. Here is what you will need:

Ingredients:

1 cup of sugar

½ c ( 1 stick) unsalted butter

3 very ripe bananas, mashed

2 eggs, well beaten

1 tsp. Vanilla

1 ¼ c. all purpose flour

1 tsp. Baking soda

½ tsp salt

Directions

1.Preheat oven to 350 degrees

2.Put the sugar and butter and butter together and mix it well in a mixing bowl

3.Add bananas, eggs and vanilla.

4.Blend well all the ingredients

5.Sift flour, baking soda and salt together

6.Add to mixture and stir thoroughly

7.Pour into greased 8 x 4 inch loaf pan

8.Bake approximately 70 minutes until toothpick comes out clean

9.Remove from pan

10.Cool completely on cooling rack before slicing

Hope everyone enjoys this delicious treat! <3

(image taken from google)


FacebookTwitterPinterest

Leave a Comment
Filed Under: Lifestyle Tagged With: Banana, Banana Bread, Banana Muffin, Fall, Hump Day, Hump Day Treat, november, recipe, Treat, Wednesday, Winter

Hump Day Treat: Halloween Themed

October 26, 2016

14612611_1814070552178919_2455011773374800816_o

14691261_1814070258845615_6947406280627805069_o

Happy almost Halloween everyone! In honor of the upcoming holiday I thought what better way to honor today’s hump day treat recipe then have it be halloween themed. One of my favorite things about halloween is obviously the candy, but as a kid I always was searching for the house with the best stash. I am sucker for anything that has M&M’s in it because they are honestly one of my favorite candy.  Here is a a really cute and easy recipe complements to Tasty from Buzzfeed that incorporates M&M’s.


Ingredients:

½ cup of butter

4 cups of marshmallows

8 cups popcorn popped ( regular no flavor)

1 package of M&M’s chocolate the harvest blend (you can honestly do any flavor you want)

1 cup white chocolate

1 cup dark chocolate

1 teaspoon orange food coloring


Directions:

  1. Put the package of M&M’s in the freezer for 15 minutes so they can be firm before using.
  2. Melt butter over medium heat. After the butter is melted add the marshmallows. Stir constantly until all of the marshmallows are melted. After remove from heat.
  3. Fill a large mixing bowl with the popcorn. Pour the melted marshmallow mixture over the popcorn and mix around with a spatula gently!
  4.  Add the M&M’s and continue to mix gently with a spatula
  5. Take a cookie sheet and grease it or you could also use parchment paper and grease that over a cookie sheet if you’d like.
  6. Apply a thin layer of cooking spray or oil to your hands and grab a handful of the popcorn mixture. Gently form into a ball and place on the cookie sheet. (Repeat this step until all the mixture is gone)
  7. Place the popcorn balls into the refrigerator for at least 15 minutes to set.
  8. Melt dark chocolate. Once cool spoon into a small ziplock plastic bag.
  9. Melt White chocolate. Stir in food color evenly. Once cool spoon into a small ziplock plastic bag.
  10. Remove popcorn balls from refrigerator
  11. Snip the corner of the dark chocolate bag to create a spout and drizzle evenly over the popcorn balls. Repeat with the white chocolate.
  12. Return to the refrigerator for at least 30 minutes to set chocolate
  13. Then place in cupcake tins if you wish and on a serving tray and ENJOY!

Images taken from Tasty from Buzzfeed


FacebookTwitterPinterest

Leave a Comment
Filed Under: Lifestyle Tagged With: Buzzfeed, Buzzfeed food, Chocolate, Halloween, Hump Day, Hump Day Treat, M&M, Marshmallows, Popcorn, recipe, Tasty from Buzzfeed, Treat

  • 1
  • 2
  • Next Page »

Social

  • Facebook
  • Instagram
  • Pinterest
  • Twitter

Archives

Site design by Aubrey Kinch Design Studio & development by Olive & Ivy Design